
Post by romaxxcnc on Feb 17, 2008 23:45:44 GMT -5
As mentioned to a few, I would explain how vac tables are made. This was done in one of the Bridgeports here, but the process is the same for any type of milling machine configuration, like the Romaxx. The difference being, you'll probably be bolting or screwing the fixture down to the table. It works the same way.
If you're currently using two sided tape to hold your projects, this is something you should really look into. This is relatively easy to setup and works like a champ. Of course it's relegated to work with a flat bottom and some considerable area. And of course you'll need an air compressor with a high enough CFM output to power the vacuum source. Unless you plan on using a vacuum pump or a shop vac.
The material should be something dimensionally stable and does not deflect easily. All metals are good candidates, Aluminum can be done in the Romaxx. Some plastics work really well, HDPE, Lexan, ABS, Acrylics, Delrin etc. Corian would also be good. UHMW should probably be avoided as it will deflect and compress under load. I would be somewhat suspect about wood as it will alter dimensionally with humidity. And compress as well. Rubber would not work. There is a lot of downward pressure that can deform soft materials.
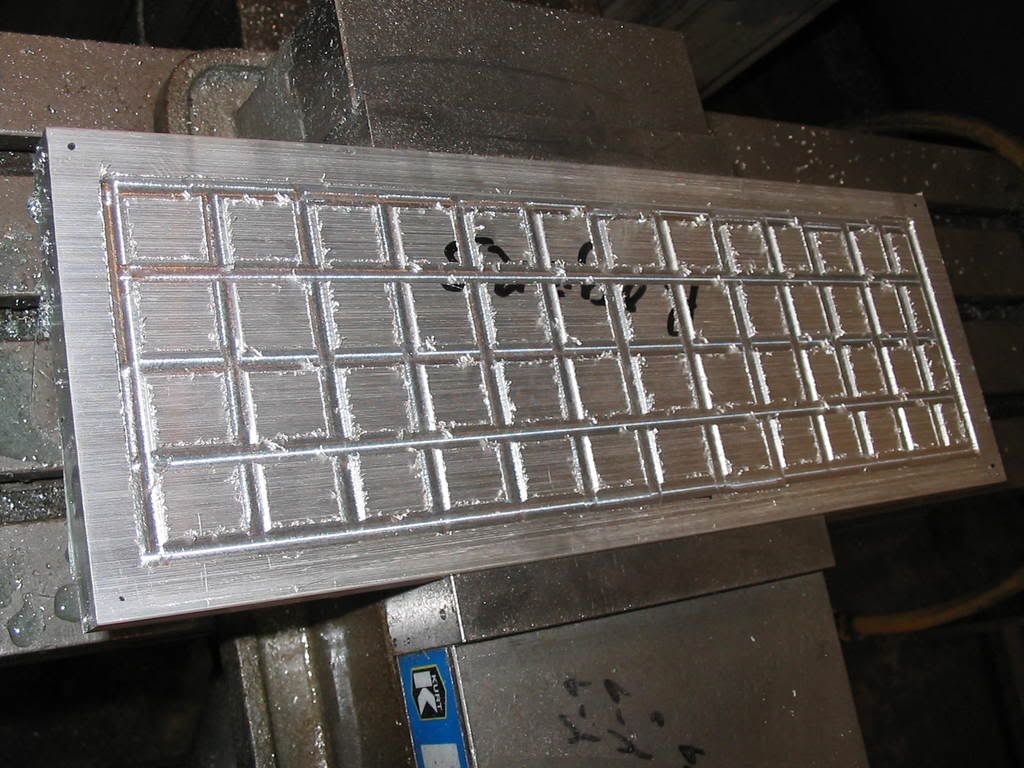
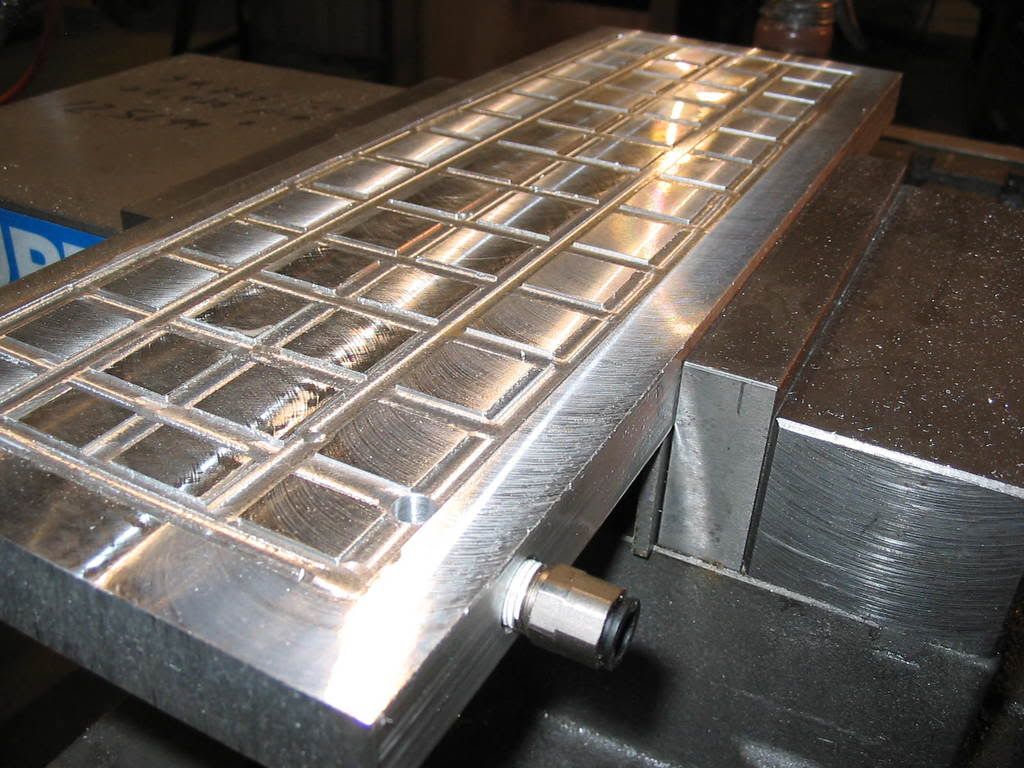
First, select a piece of material slightly larger than your workpiece. Cut a grid 1" X 1" as shown in the pic. Use a 1/4" or less diameter cutter. About .050" deep is sufficient. Make sure the grid is smaller than the perimiter of your workpiece.
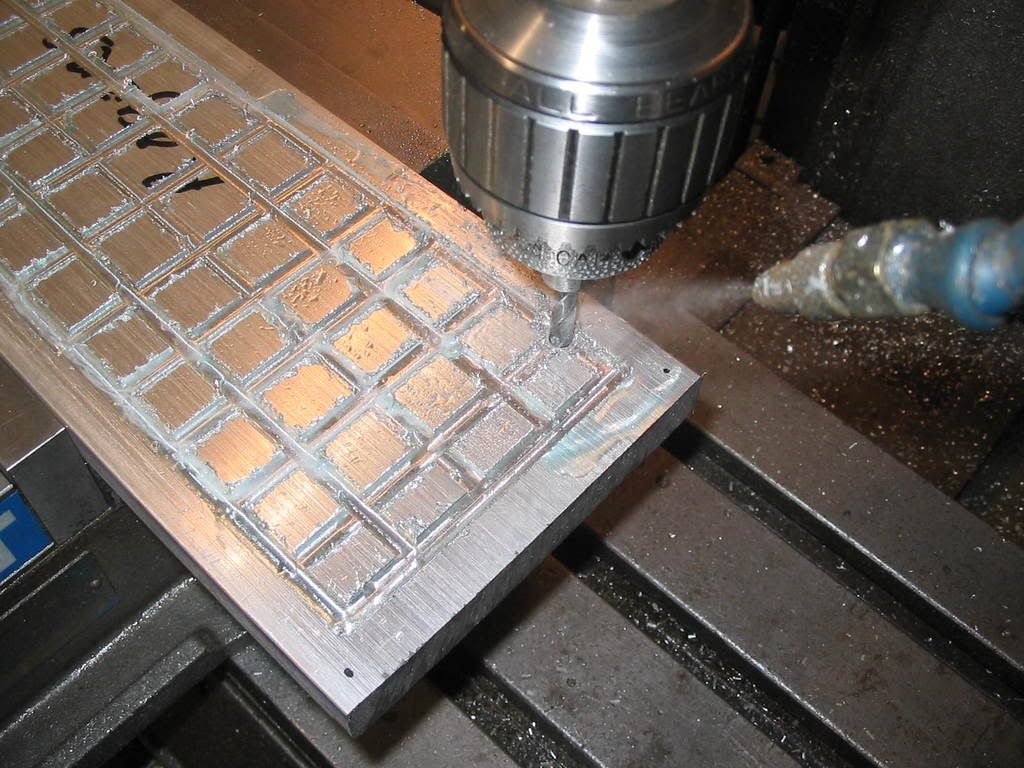
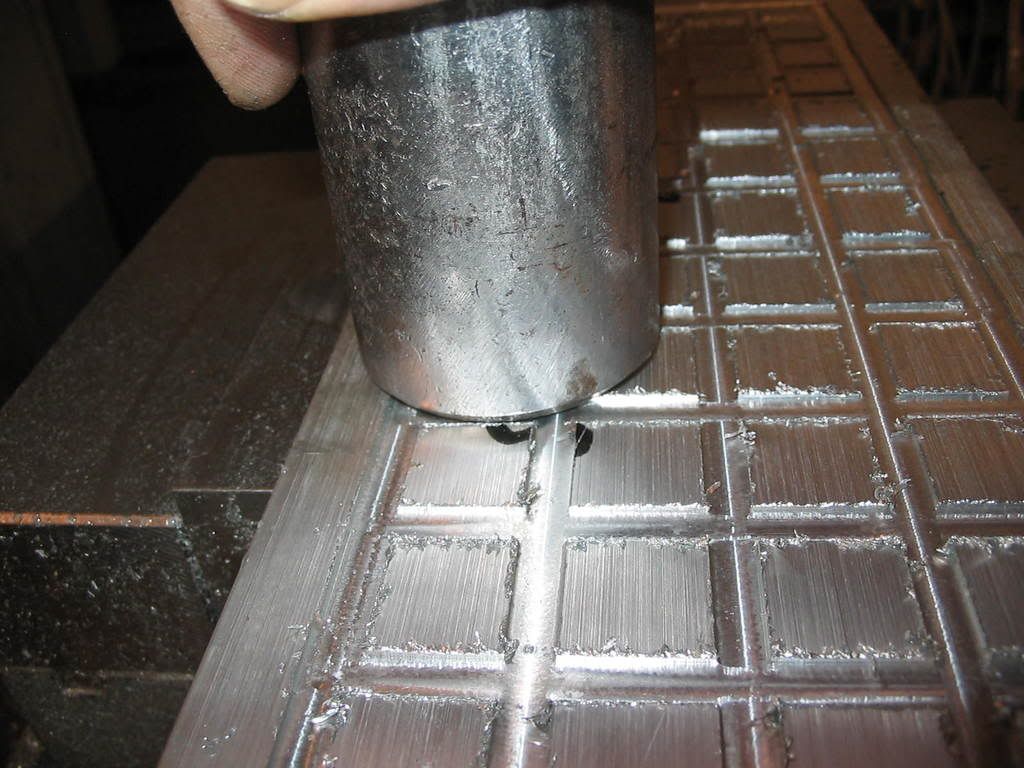
Next, start the port from the grid area to the vacuum source. By drilling a 1/4" hole in a channel of the grid, near the edge down into the fixture, but not all the way thru, as the pic shows.
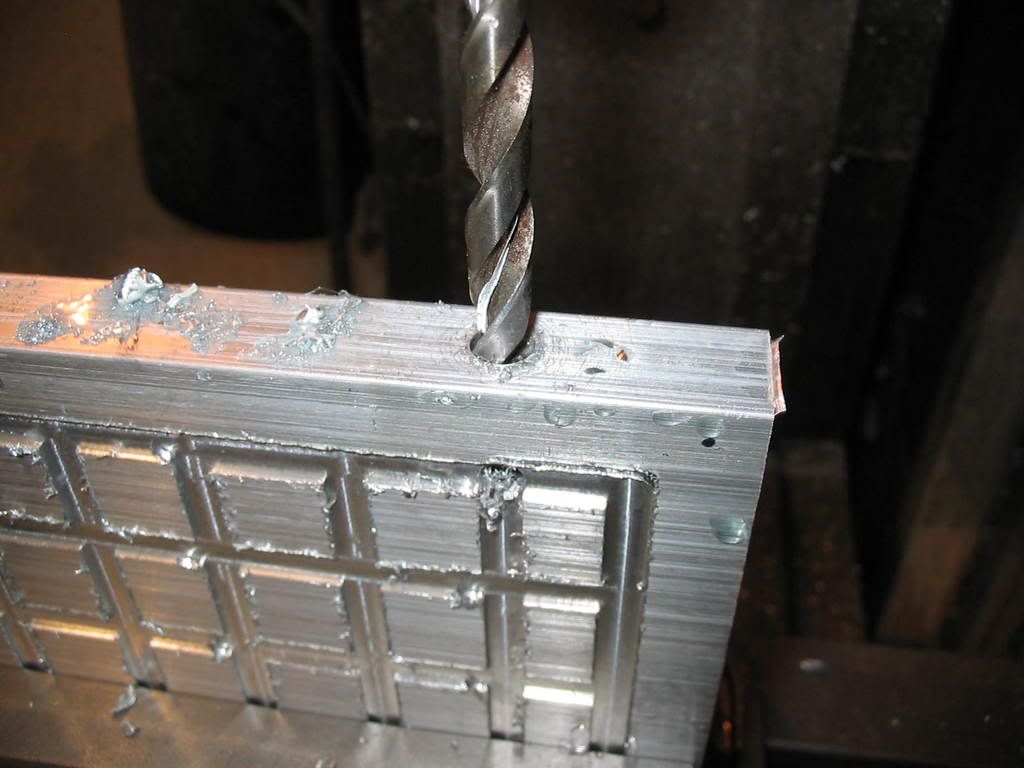
Next, we need a way to attach a fitting to the fixture and port to the hole we just drilled. Use an 11/32" bit (.343") which is a tap minor for an 1/8" NPT (1/8" pipe thread) thread. Like this:
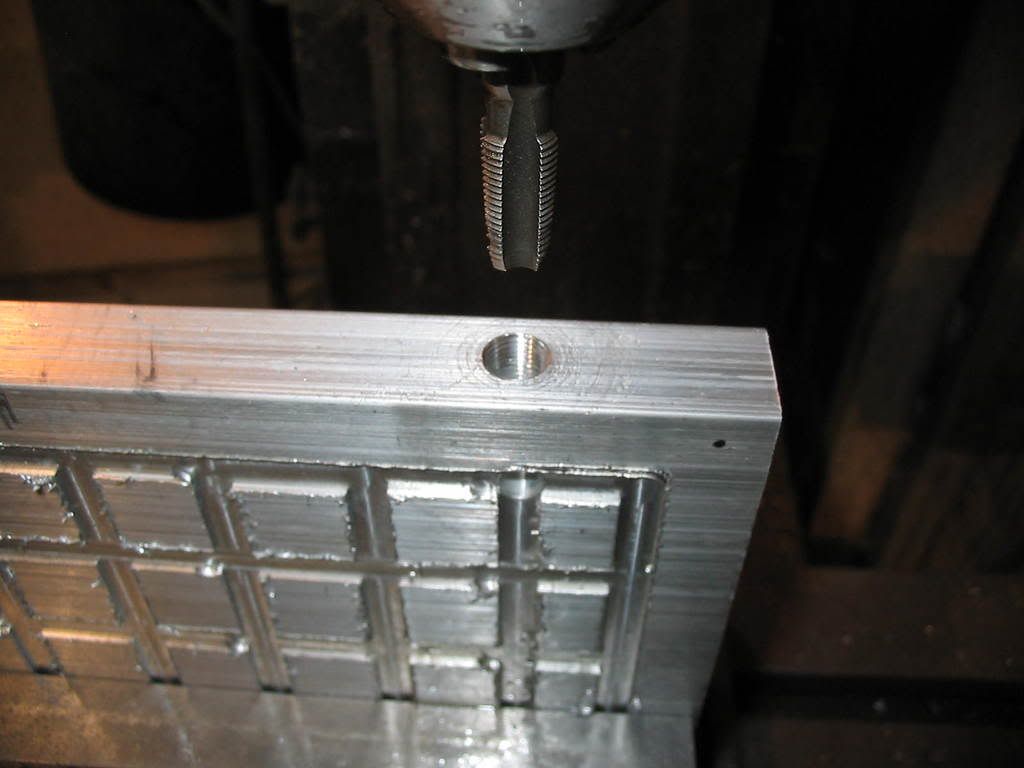
Now let's chamfer and tap that with a 1/8" pipe tap. I think I could've found a better tap, that one has a few teef' miffin'.
Next we need to make sure we're down in the vise and the fixture is where it will be the next time we go to use it. Same as bolting down, always want to make sure it gets bolted in the same place and same orientation every time it's set up. I'm using a piece of stock as a deadblow, to make sure it's down on the parallels.
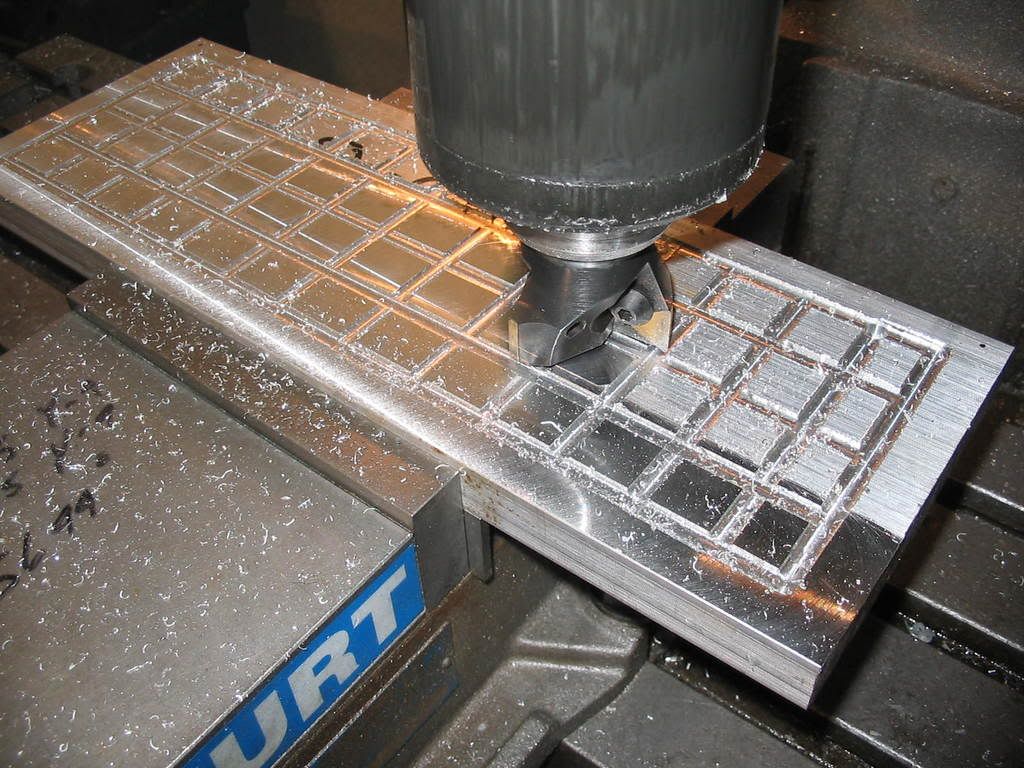
Next. we need to establish the work surface relative to the X-Y plane of the machine. This will allow us to control Z depth over the entire surface. I'm using a face mill here, a 1/2" flat bottom router bit will do the same thing. That facemill is spinning at 2000 RPM, this Canon A60 has good shutter speed.
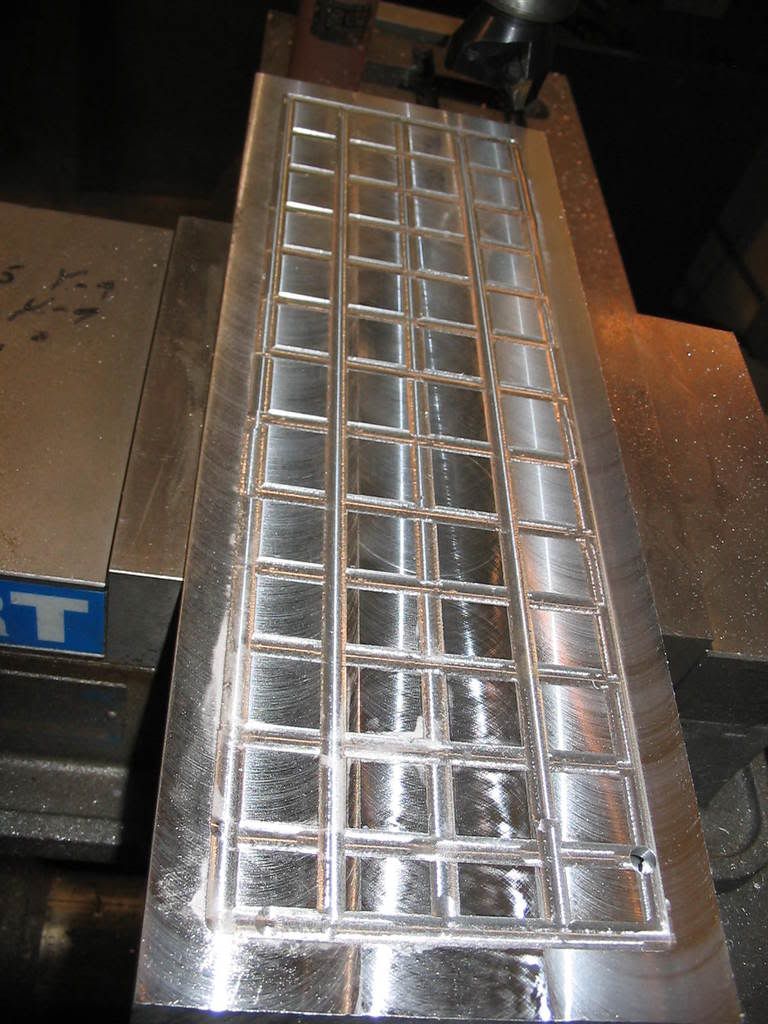
And here is our finished surface:
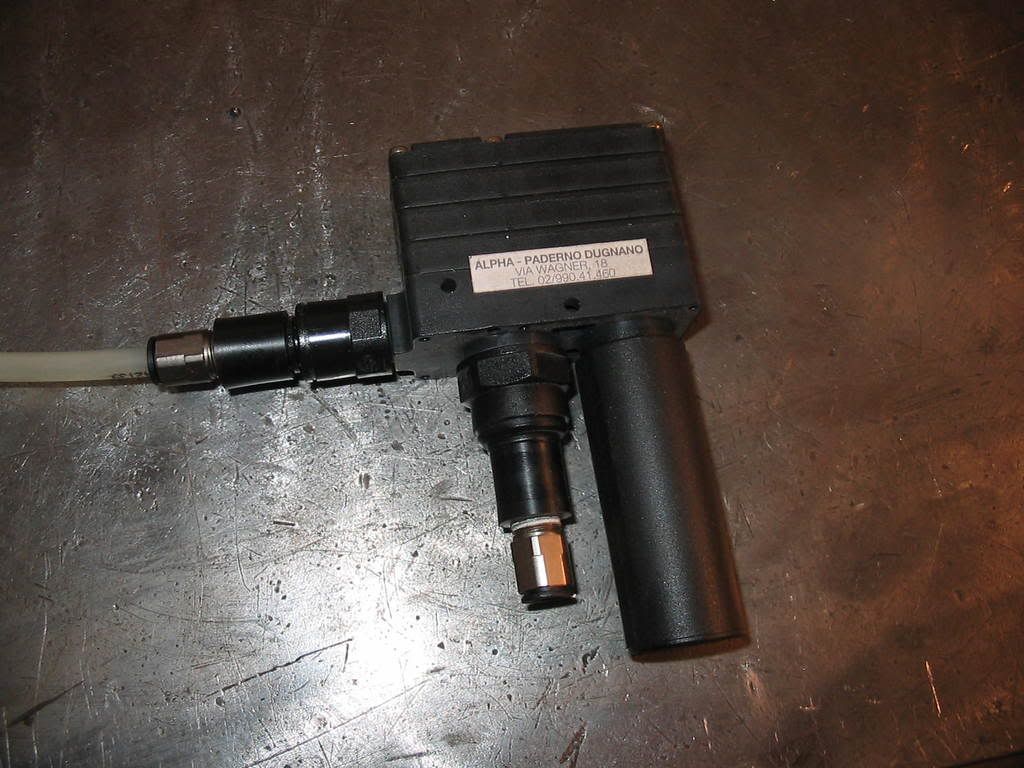
Next we need to ready our vacuum source. I'm using a "PIAB" its like an model "S40"? if I recall correctly. These are the neatest little vacuum generators. A bit pricy new, but lots of them on Ebay for around 20 bucks. There are no moving parts, just feed air into one line and it emits through the muffler looking thing, and it produces a powerful vacuum source on the remaining line. Some internal venturi create the vacuum. They use these a lot in automotive tooling. For powering suction cups that pick up body panels, glass etc. They don't use much air to operate. Piab has all the engineering data on their website. They are quiet too.
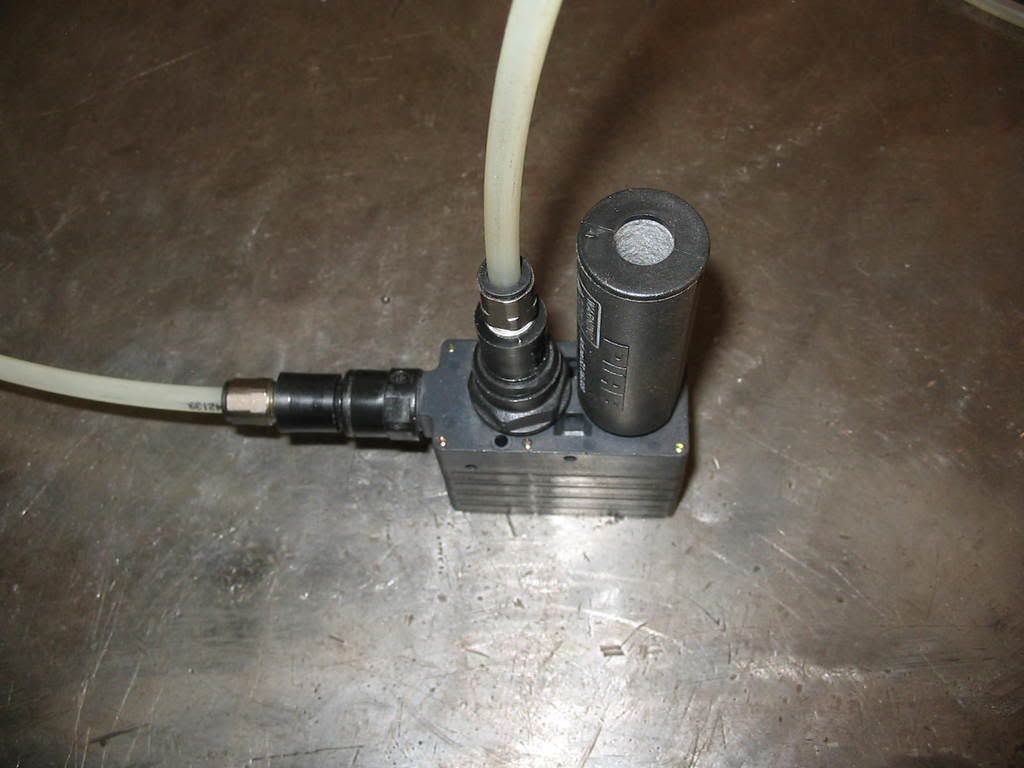
Here is the fixture with fitting installed and ready to be connected to a vacuum source.
Here is the trial run, lay down the material flip on the vacuum and the part is held very secure. It is really on there too, I tried to displace it by pushing on it and it won't budge.

Wrapping up: This works really well. We ran several parts on it and had no problems at all. No sticky tape or glue to fight with. Changing parts is really fast. I would guess that if a shop vac was going to be used, one might need a larger port. What's most important is how well the part seals against the fixture. Any leakage is going to reduce the holding power and require a vac source with higher CFM rating.
Any size part should be able to be attached by masking off the portion of the exposed grid and butting the edge of the smaller part to the blanked off section.
Good luck with it, and if you have any questions, feel free.
Thanks, Ron
If you're currently using two sided tape to hold your projects, this is something you should really look into. This is relatively easy to setup and works like a champ. Of course it's relegated to work with a flat bottom and some considerable area. And of course you'll need an air compressor with a high enough CFM output to power the vacuum source. Unless you plan on using a vacuum pump or a shop vac.
The material should be something dimensionally stable and does not deflect easily. All metals are good candidates, Aluminum can be done in the Romaxx. Some plastics work really well, HDPE, Lexan, ABS, Acrylics, Delrin etc. Corian would also be good. UHMW should probably be avoided as it will deflect and compress under load. I would be somewhat suspect about wood as it will alter dimensionally with humidity. And compress as well. Rubber would not work. There is a lot of downward pressure that can deform soft materials.
First, select a piece of material slightly larger than your workpiece. Cut a grid 1" X 1" as shown in the pic. Use a 1/4" or less diameter cutter. About .050" deep is sufficient. Make sure the grid is smaller than the perimiter of your workpiece.
Next, start the port from the grid area to the vacuum source. By drilling a 1/4" hole in a channel of the grid, near the edge down into the fixture, but not all the way thru, as the pic shows.
Next, we need a way to attach a fitting to the fixture and port to the hole we just drilled. Use an 11/32" bit (.343") which is a tap minor for an 1/8" NPT (1/8" pipe thread) thread. Like this:
Now let's chamfer and tap that with a 1/8" pipe tap. I think I could've found a better tap, that one has a few teef' miffin'.
Next we need to make sure we're down in the vise and the fixture is where it will be the next time we go to use it. Same as bolting down, always want to make sure it gets bolted in the same place and same orientation every time it's set up. I'm using a piece of stock as a deadblow, to make sure it's down on the parallels.
Next. we need to establish the work surface relative to the X-Y plane of the machine. This will allow us to control Z depth over the entire surface. I'm using a face mill here, a 1/2" flat bottom router bit will do the same thing. That facemill is spinning at 2000 RPM, this Canon A60 has good shutter speed.
And here is our finished surface:
Next we need to ready our vacuum source. I'm using a "PIAB" its like an model "S40"? if I recall correctly. These are the neatest little vacuum generators. A bit pricy new, but lots of them on Ebay for around 20 bucks. There are no moving parts, just feed air into one line and it emits through the muffler looking thing, and it produces a powerful vacuum source on the remaining line. Some internal venturi create the vacuum. They use these a lot in automotive tooling. For powering suction cups that pick up body panels, glass etc. They don't use much air to operate. Piab has all the engineering data on their website. They are quiet too.
Here is the fixture with fitting installed and ready to be connected to a vacuum source.
Here is the trial run, lay down the material flip on the vacuum and the part is held very secure. It is really on there too, I tried to displace it by pushing on it and it won't budge.
Wrapping up: This works really well. We ran several parts on it and had no problems at all. No sticky tape or glue to fight with. Changing parts is really fast. I would guess that if a shop vac was going to be used, one might need a larger port. What's most important is how well the part seals against the fixture. Any leakage is going to reduce the holding power and require a vac source with higher CFM rating.
Any size part should be able to be attached by masking off the portion of the exposed grid and butting the edge of the smaller part to the blanked off section.
Good luck with it, and if you have any questions, feel free.
Thanks, Ron

